A PDF is available for download at the bottom of this article.
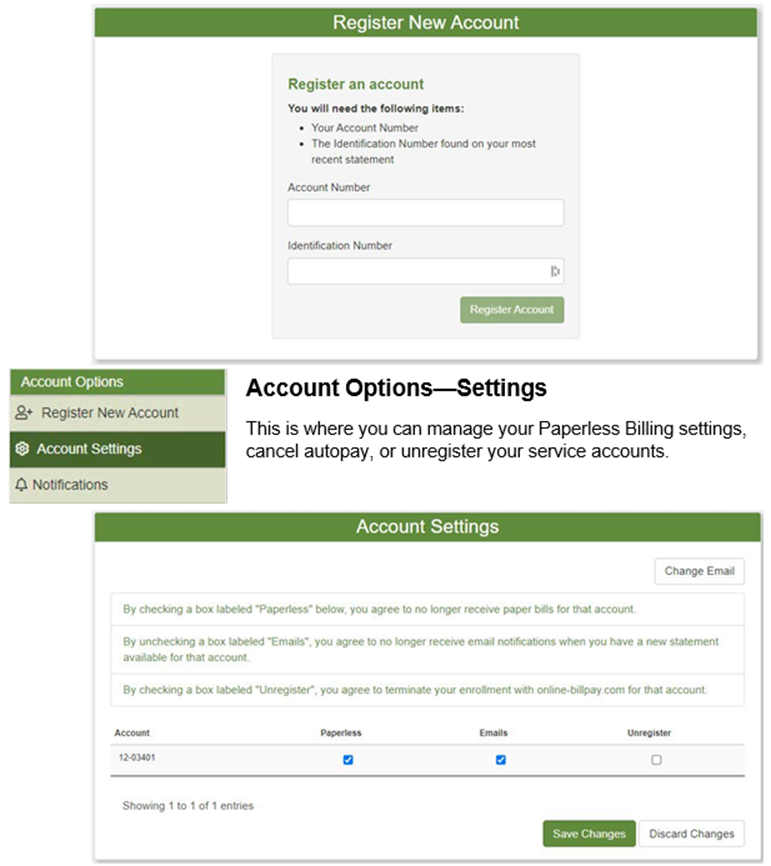
To use the Online-Billpay, you will need to register a service account using your account number and identification number. Both items can be found on your regular billing statement. The registration process is outlined in a separate help guide. This guide will cover everything you’ll see after registration.
In this guide, we’ll present a high-level survey of the major Features, then we’ll outline the steps for specific Common Activities on the site.
Note: This guide is based on the default Online-Billpay settings. The service provider may have requested customizations for their customers which will not appear in this guide.

Mobile View
If you are using a mobile device, the menu may be collapsed. You can click on the three horizontal lines in the top left corner to expand the menu. The layout of certain pages may be slightly different in the mobile view, but the features and functionality are the same.

Customer Portal
When you first log in you will be brought to this welcome page. It contains an overview of where to find the major features, and a link to download Adobe Acrobat Reader. You will need Adobe Reader to view any PDF statements posted on the site.

Features
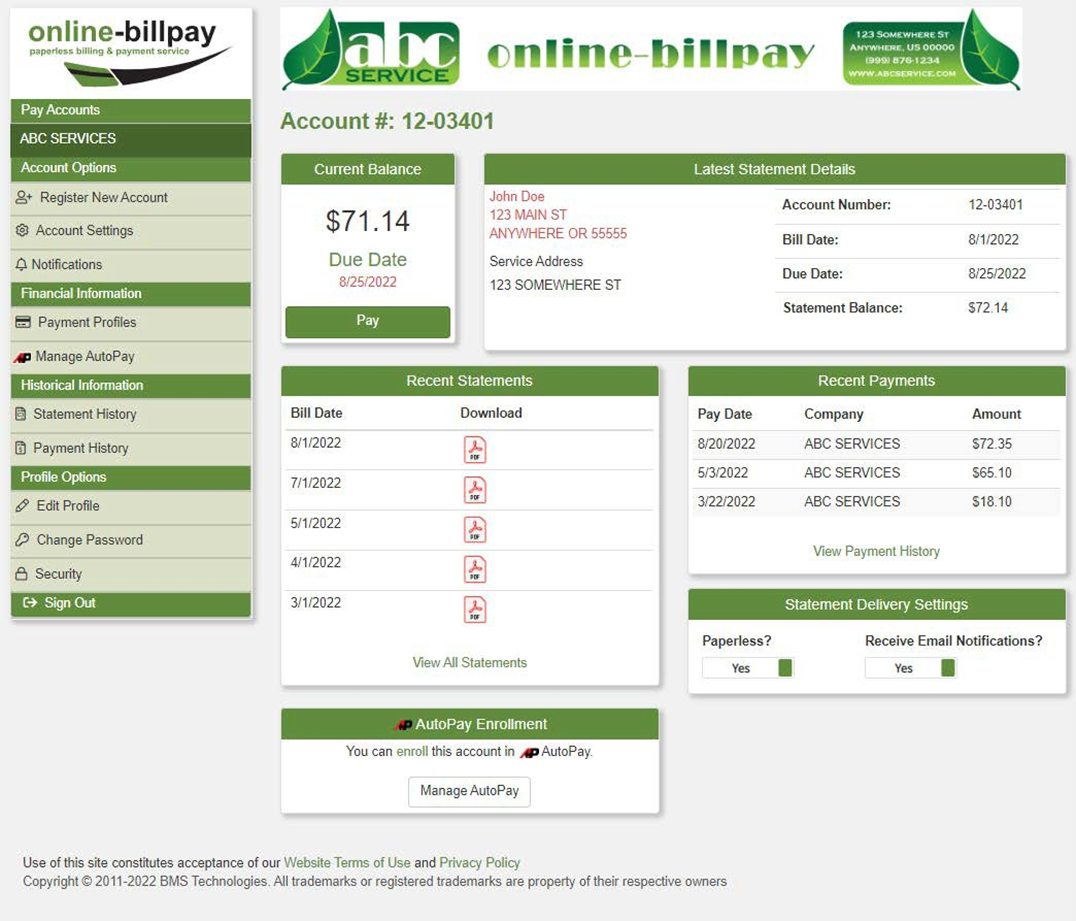
Pay Accounts—Account Details
You can see the most current and relevant account information under the Pay Accounts heading.
When you click on a company name, you’ll be taken to the Account Details page. On this page you’ll be able to view recent statements and payments, change your paperless and email delivery settings, and make a payment.
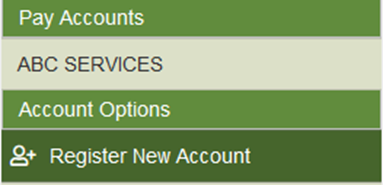
Account Options—Register New Accounts
You have the option of adding more than one service account to a single Online-Billpay login. You can do this for the same service providers, and other companies that use Online-Billpay. For example, you may have water and garbage services through different providers. If both companies use Online-Billpay, you can add both accounts to a single login. You can do this through the Register New Account page.
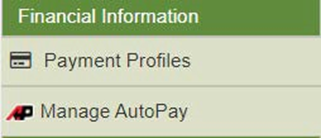
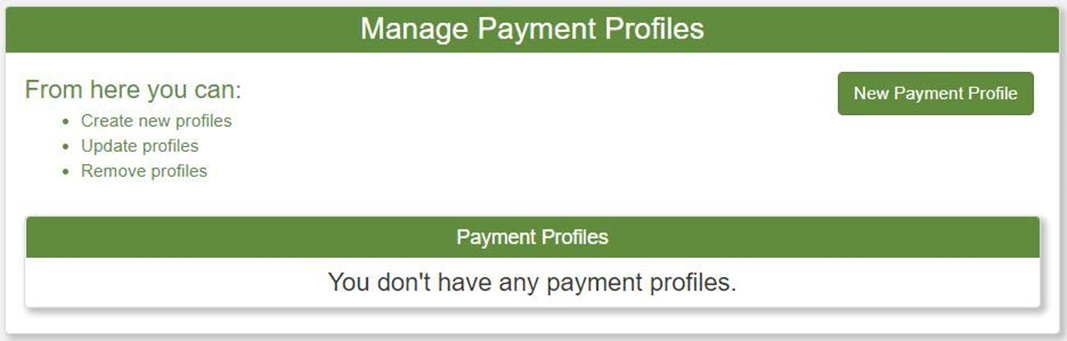
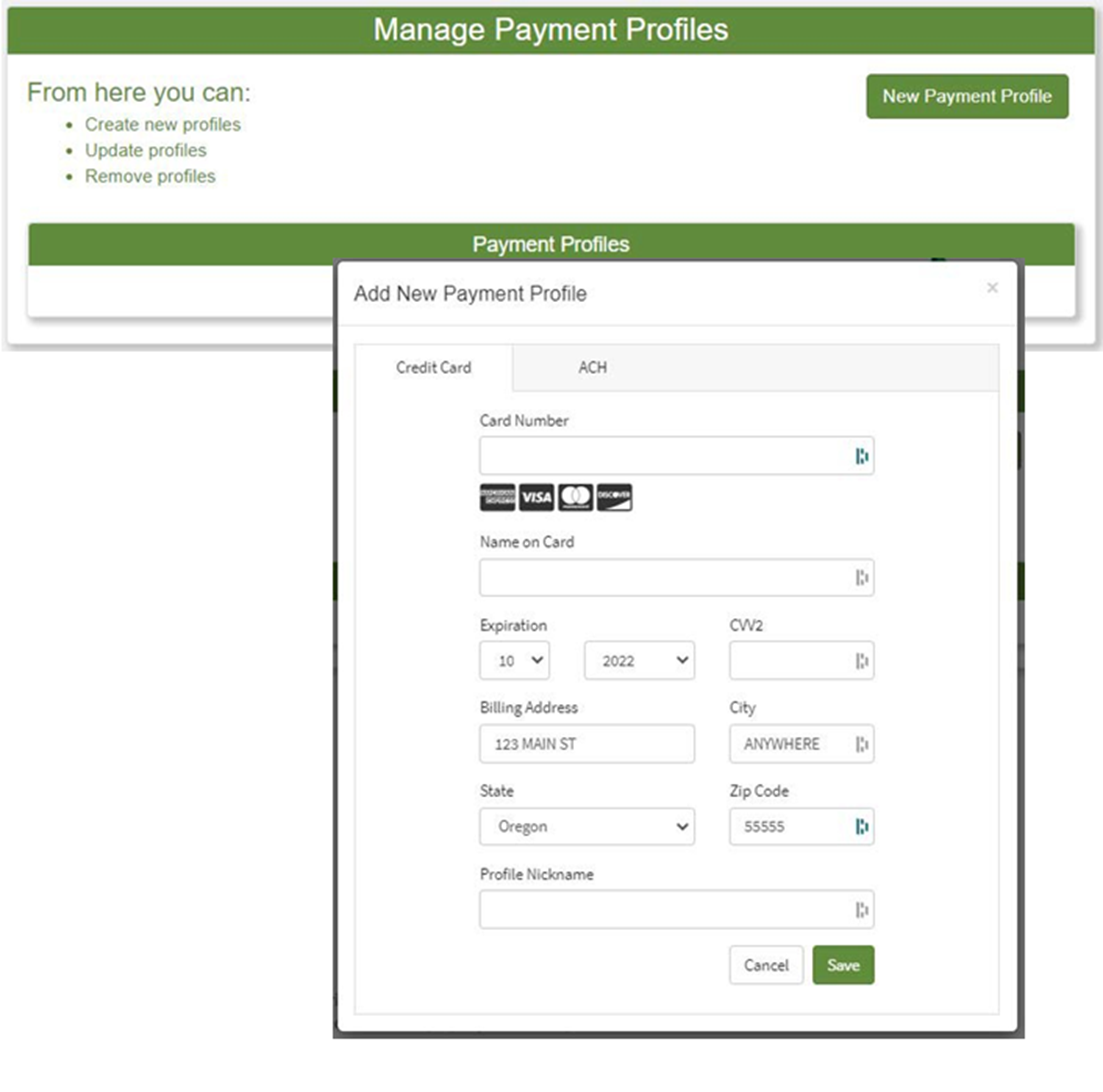
Financial Information—Payment Profiles
You have the option to store a payment profile for future use. This eliminates the need to enter payment information every time you make a payment.
This can be done through the Payment Profiles page. You can also store a payment profile when making a payment. See Make a Payment.
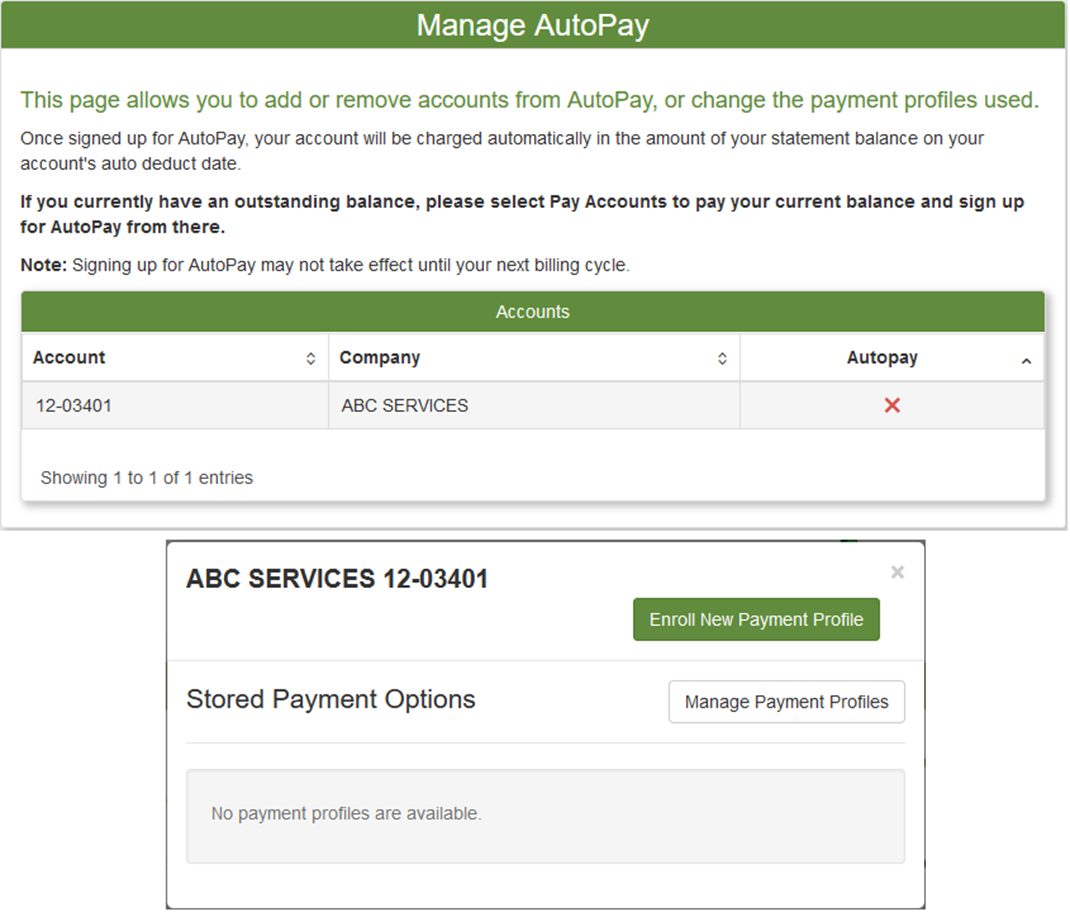
Financial Information—Manage Autopay
You may also enroll in autopay. This will store your payment information and the account balance will be withdrawn from your bank account or credit card automatically on the service provider’s schedule. You can also enroll in autopay while making a payment. See Make a Payment.


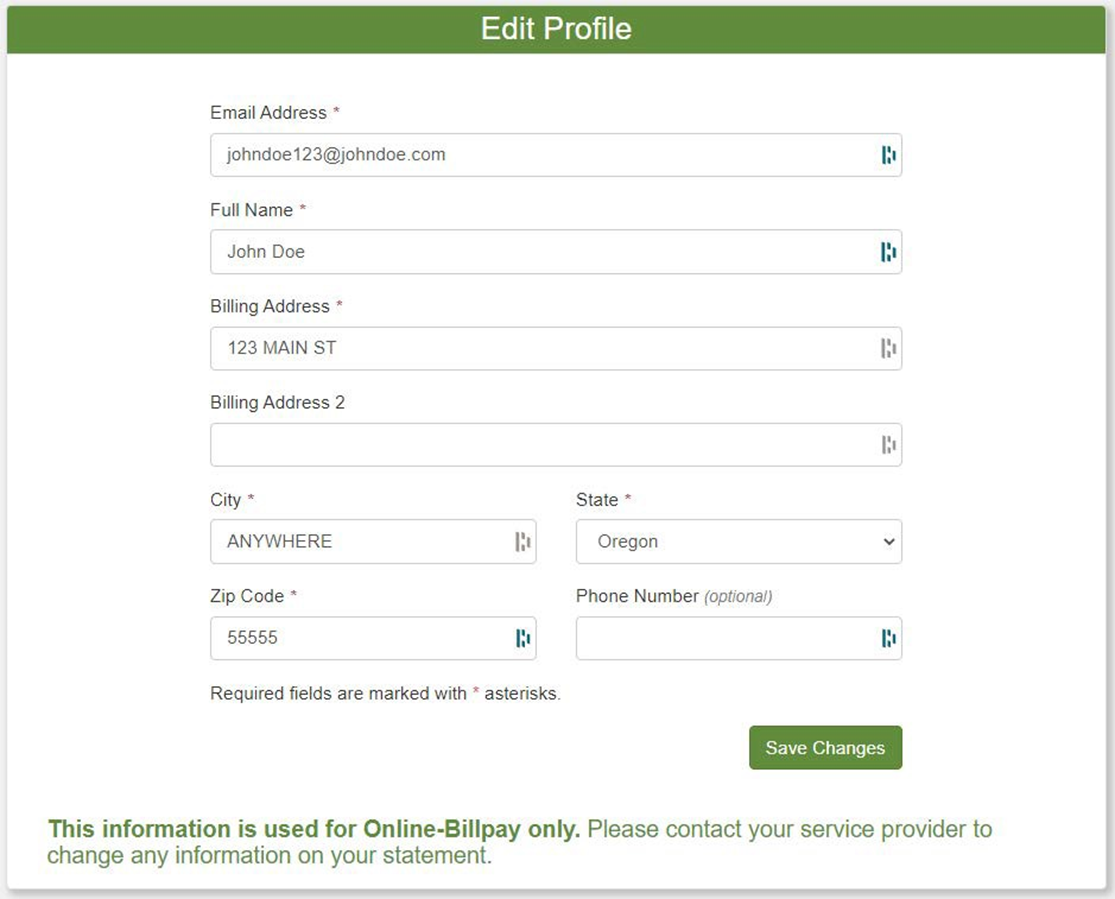
Profile Options—Edit Profile
Using the Edit Profile page, you can update your name, email address, and billing address.
Note: Updating a billing address in Online-Billpay will not send the information to the service provider. It will only update the auto-fill information on the payment window. Customers must call their service provider to update the information for billing.
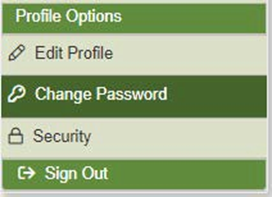
Profile Options—Change Password
You may choose to change your password periodically through the Change Password page. If you’ve forgotten the password, you may also request a reset through the main login page by clicking the Forgot Username or Password link and entering the email address used to register.


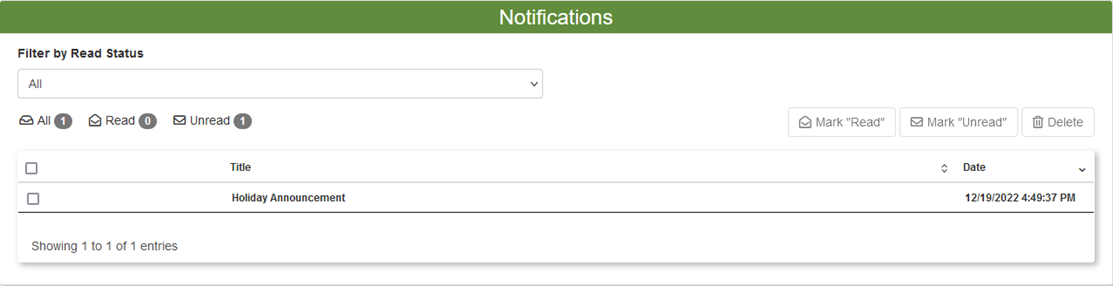
Notifications
The service provider may post Notifications on Online-Billpay. When you log in, you’ll see a red indicator on the menu indicating there’s a new message. Clicking on that the Notifications link will take you to a list of all notifications, old and new. Once read, you can choose to delete the notification.
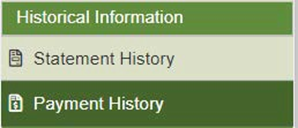
Payment History
We will store at least two years of payment data on the site. This can be viewed by clicking on
Payment History, under the Historical Information heading.

Common Activities
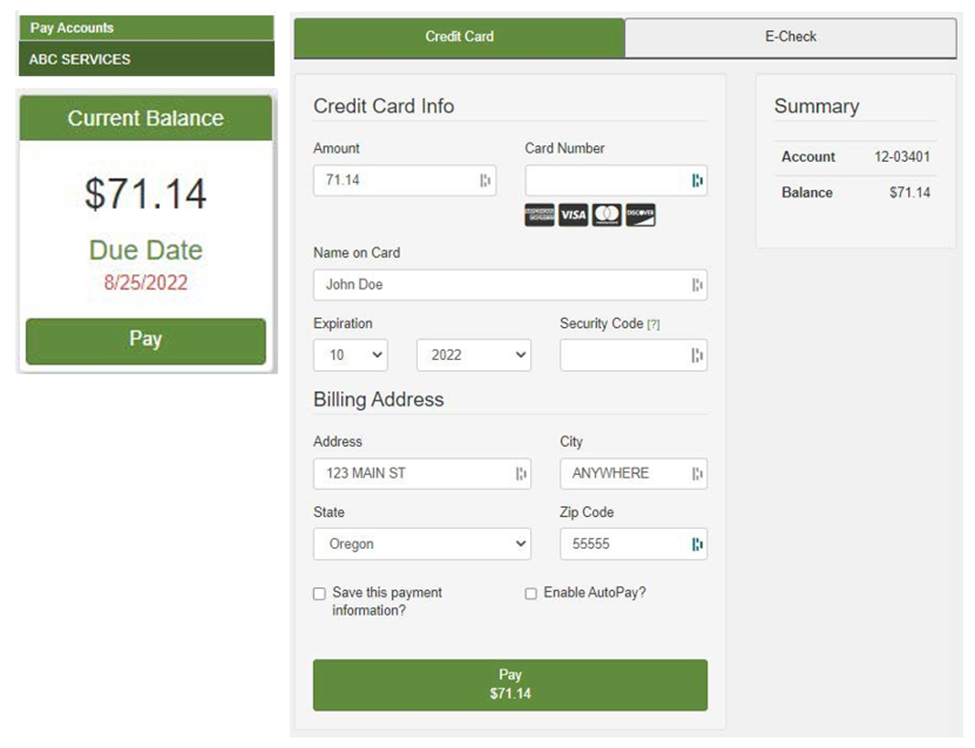
Make a Payment
1) Under Pay Accounts, click the name of the company you’d like to pay.
2) Click the Pay button.
3) You’ll be taken to the Payment page. Select either the Credit Card or E-Check (ACH) tab and complete all fields on the form.
4) If you’d like to store your information for future use, check the “Save this payment information?” box.
5) If you’d like to store your information and enroll in AutoPay, check the “Enable AutoPay?” box.
6) Once all fields are complete, click the Pay button.
Store Payment Information for Future Use
1) Navigate to the Payment Profiles page under Financial Information.
2) Click New Payment Profile.
3) Select either the Credit Card or E-Check (ACH) tab.
4) Complete all fields on the form.
5) Click Save.
6) You can also create a payment profile when you make a payment. See page 10.
Enrolling in AutoPay
1) Navigate to the Manage AutoPay page under Financial Information.
2) Click anywhere on the row for the account you want to enroll in AutoPay.
3) Click the Enroll New Payment Profile.
4) Select either the Credit Card or E-Check (ACH) tab and complete all fields on the form.
5) Click Save.
You can also enroll in AutoPay while making a payment. See Make a Payment.
Note: If you already have a saved payment profile, you can select which profile you’d like to use for AutoPay and click Enable AutoPay.
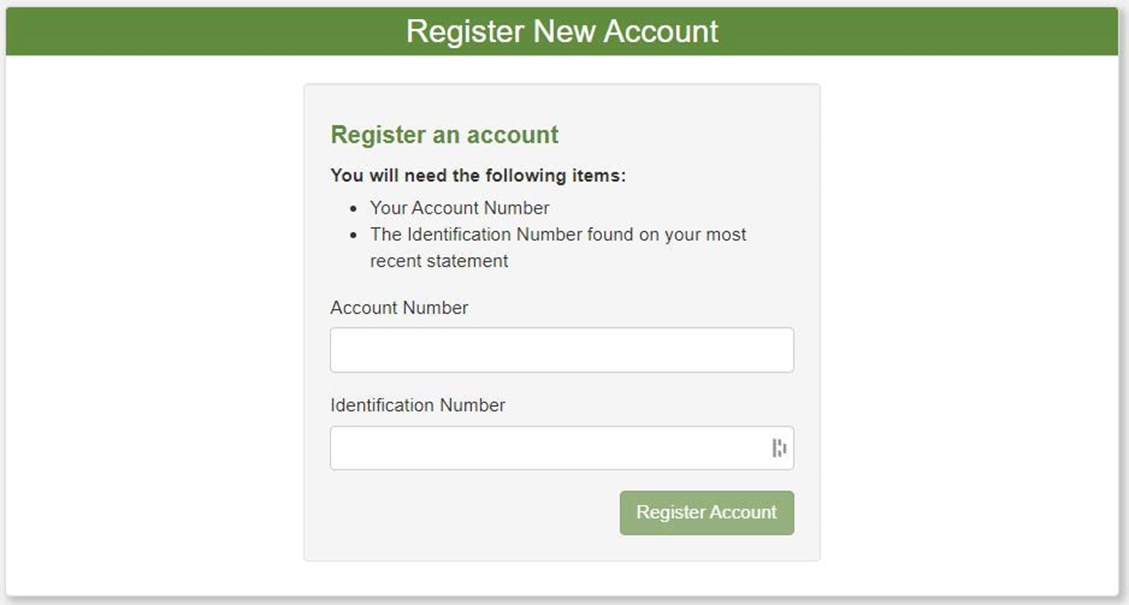
Adding Service Accounts to Your Existing User
1) You will need the Account Number and Identification Number for the account to be added.
2) Under theAccount Options heading, click Register New Account.
3) Enter the Account Number and Identification Number. Then click Register Account.
4) You’ll receive a confirmation message and an option to enroll the account for Paperless Billing.

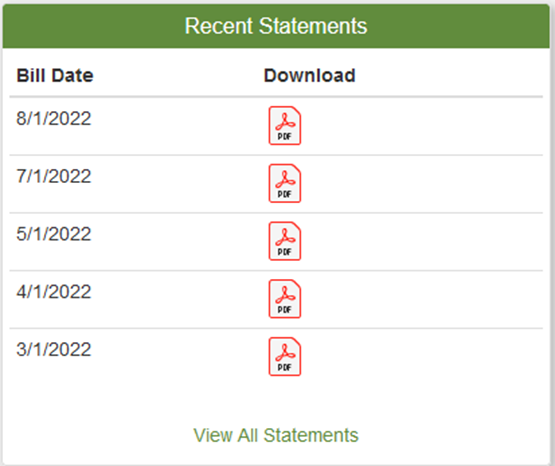
1) Under Pay Accounts, click the name of the company you’d like to view.
2) Under Recent Statements there is a list of statements you can view. Click on the PDF icon for the statement you want to view.
3) Your browser may ask if you want to open the PDF. Click Open or Yes, depending on the browser.
4) You can click on View All Statements or use the Statement History page to see all of your statements on the site.
Note: The PDF will include any inserts sent with that statement and the back side of the PDF as additional pages.
Viewing Another Registered Service Account
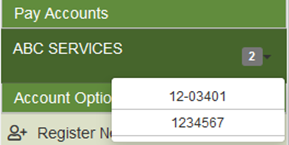
If you have registered multiple service accounts with the same service provider, you will see a number next to the name of the company indicating how many accounts are registered. Click on the number to expand a menu to select a specific account. You can also click on the company name to see an overview of all accounts registered with that service provider.
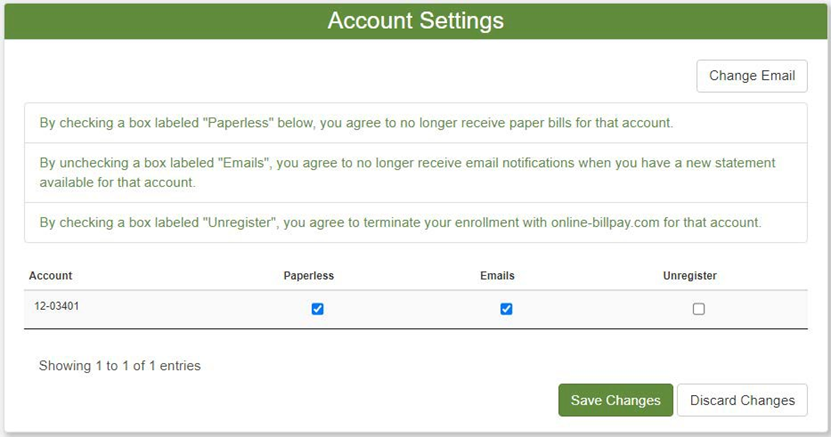
Managing Settings
You can change your Paperless and Email Settings and unregister service accounts through the Account Settings page.
· To remove an account from paperless billing, uncheck the Paperless box.
· To stop receiving new statement notification emails for an account, uncheck the Emails box.
· To remove an account from your user, check the Unregister checkbox.
· Click Save Changes to apply any changes.
|
Rate this Topic:
|
|||
|